Illustration Machine is a Figma Weave workflow built around the idea of generating a set of on-brand illustrations from reference images, without the need to manually write a single style prompt.
They say that you basically upload your reference images, and it generates six images that all match your reference aesthetic, ready to use as a complete set. Let’s see if it actually works.
To give this exploration a more structured framework, I broke it down into 6 stages:
1. Putting together my reference images
2. Establishing the visual style I want
3) Style Guide Maker
4) Illustration Machine Core
5. Nano Banana Pro Outputs Analysis
6) Final Results and Conclusions
1. Putting together my reference images
The idea behind these illustrations was to test whether this kind of artwork could eventually be integrated into a client’s outdoor sports merchandising catalog. I wanted the illustrations to feature an athlete with exaggerated body proportions and dramatic perspectives. It’s a style I’ve noticed a lot in sneaker and sportswear branding.

Once the selection was ready, I had a general idea of the models’ poses, but visually it was still a bit of a mix of different colors and styles. Illustration Machine asks us to provide references that are already “on brand” — with a clear, consistent visual language. The default example they provide is:

2. Establishing the visual style I want
The next challenge was to turn my collection of references into a cohesive visual style. The direction I wanted for my illustrations was something like this:

I moved to Figma since I already had my full reference collection organized there, which made the process easier. From there, I used the Transfer Style tool. You choose your “target” image — the one you want to transform — and then select your “style source” — the image that defines the visual style.
This tool, recently added to Figma, follows this workflow.

I then applied the desired style transfer to all the references I had gathered. The top row shows the original references, while the bottom row shows the same images after the style has been applied:

3. Style Guide Maker
I brought all the generated images into the canvas and connected them to the Composer, creating a unified grid layout where I could see them all together.

Then, the Style Describer section already has the structure defined, so we don’t need to modify anything. We just need to click “Run Model” so it updates the output based on our images. It generates a very detailed description, something like:

4. Illustration Machine Core
Moving into the core workflow of Illustration Machine, we’re going to stick to the main premise: “without manually writing a single style prompt.” The only thing we need to define is the type of illustrations we want to generate. In the “Illustration Subject” field, the default prompt was: “2 characters shaking hands.” For my experiment, I changed it to: “1 character doing kayak.”

Next, we run the “Any LLM” node. This node connects the reference images, the illustration subject we just defined, and the Prompt Concatenator, which combines all the inputs into a single workflow. The LLM output generates an array with 6 individual prompts, each one already connected to a Nano Banana Pro model that we’ll execute in the next step.
5. Nano Banana Pro Outputs Analysis
Alright, for the final step, we now have our 6 prompts connected to 6 separate Nano Banana Pro modules. Each module also receives our initial reference grid as the visual reference input. We simply run the model on each one and review the results:

Overall, considering that the entire process was fully automated, I think the results are a solid starting point. The style, grain texture, and color palette are applied consistently in almost every case, with the exception of the 4th image, where the red tones become a bit too dominant. From a structural perspective, the model attempts to achieve “extreme forced perspective” and “exaggerated proportions,” but it still falls slightly short. Results 3 and 5 show some unusual compositions, with disconnected elements that lack clear meaning. However, we would need to inspect the prompts generated by the machine to better understand these outputs. A special mention goes to the character in illustration 6, who unexpectedly developed an extra right arm coming out of his stomach. 🫣
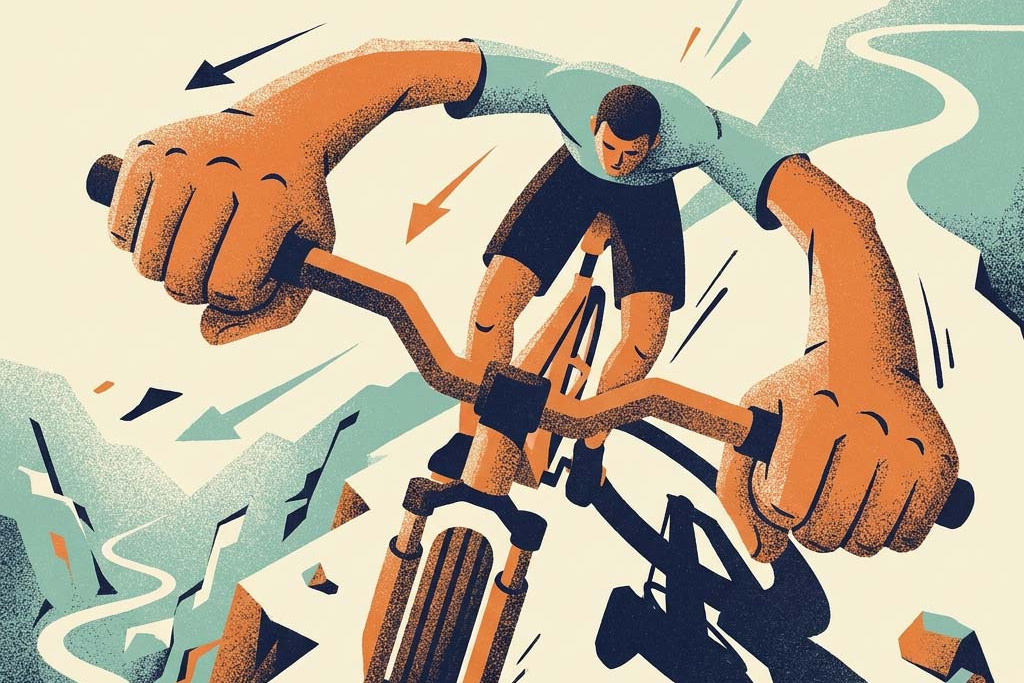
To avoid limiting the analysis to just the Kayak example, I changed the Illustration Subject to “Mountain Bike,” ran the same workflow again, and the results in this case are actually more convincing:

6. Final Results and Conclusions
Work Time Breakdown: Total time: 1 hour and 37 minutes.
• Reference and style research: ~1 hour. Since I already had a clear direction in mind, this phase was relatively quick.
• Running ‘Transfer Style’: 2 minutes per image × 10 images = 20 minutes.
• Uploading images, generating grid, updating illustration subject, running LLM’s models: 5 minutes.
• Running Nano Banana Pro: 2 minutes per image × 6 images = 12 minutes.
(Adding a coffee break and some extra review time, I’d round the whole process to approximately 2 hours.)
Credit Cost (x6 illustrations): Total Credits: 78
• Transfer Style: 1 credit per image 👉 10 images, total= 10 credits.
• LLM nodes: 2 credits
• Nano Banana Pro: 11 credits per image 👉 6 images, total= 66 credits.
Final Takeaways:
As mentioned earlier, I see these results as a very good starting point. Considering both the time invested and the credit consumption, the process is highly efficient. We achieved a strong visual direction with minimal time and relatively low cost.
Do we already have a production-ready illustration set? Definitely not. There is still an iteration phase ahead. We need to analyze the generated prompts, understand the decisions behind each output, and refine them to improve the weaker results. After this process, we could potentially build a strong reference set to communicate our vision and requirements to an illustrator.
Could someone simply add a headline and publish these results directly on Instagram? Probably. But that’s a creative decision everyone has to make for themselves. (?)